Now, saying this would normally land you in front of the mirror, flexing your pecs, abs and biceps, then walking away confidently saying to yourself "Yeah, I still got it".
But she had good reason for saying it - in fact she relished in it.
But she had good reason for saying it - in fact she relished in it.
"Am I really?" I replied excitedly.
My waistline was not increasing in girth, no middle age spread, no man boobs, no implants or body augmentation surgery, alas it was far more exciting than that.
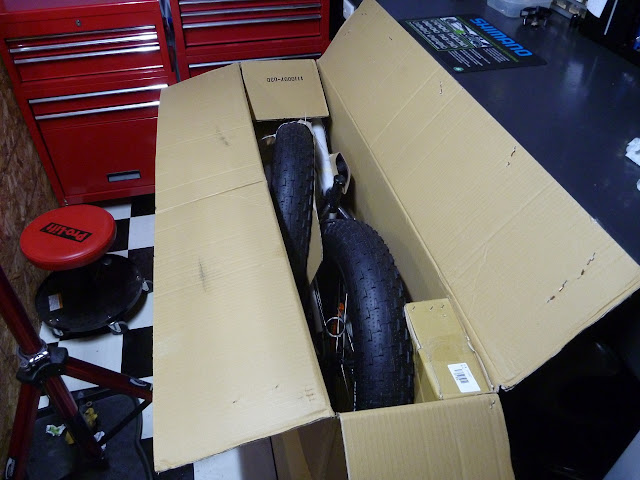
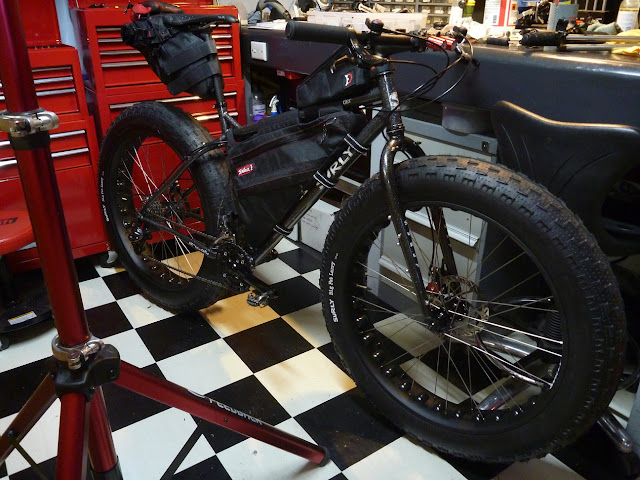
It was time for a new bike to join the family. Not just any bike, it was a fat bike.
The bike arrived in a really, really big bike box. The tyres are 5" wide. I'm more of a function over form kinda guy, but as I was building it, it was triggering synapses in my brain that get excited when I see tactical response vehicles, APCs, podium baja/desert trucks and rockcrawlers.
To quote Tim Allen from Home Improvement " You never really own something, until you've built it with your own hands" argh argh, it was time for me to don the apron and get building.

I built the bike, then road tested it for fit by commuting to work a few times and doing a river loop ride with the shop bunch. Turned a lot of roadie heads, and was great to have it on display in the shop as a talking point for customers.
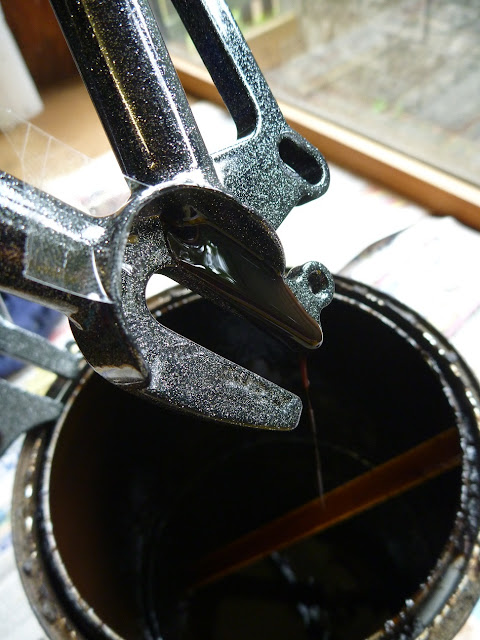
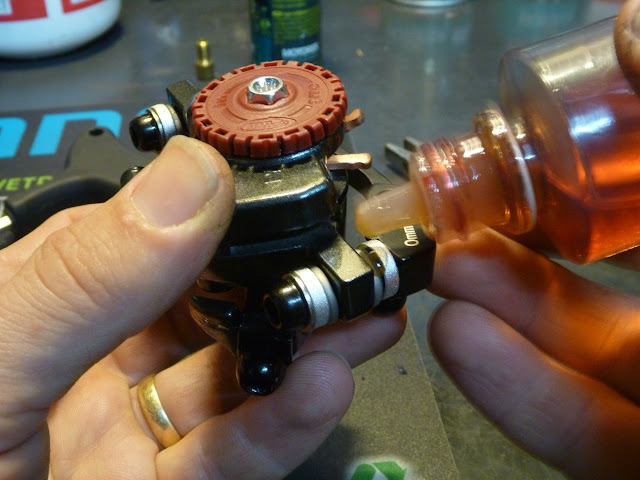
We've got quite a few trips planned, many of them on the beach and in harsh environments, and being a steel frame and fork it needed to be treated where the paint don't go - inside the tubes. I've rustproofed plenty of my 4wds for beach work, so to keep the duco pretty and the frame rust free internally it was time to do the same. Tear down bike to bare frame.

Process and product the same, coat all exposed steel surfaces with cavity wax, I've used fish oil with success too, but takes a long time to cure and weeps forever.

Frame tubes have holes either internally or externally, they allow water, air and contaminants into the frame and that's where the rust process begins. I cover one of the holes on each tube with tape, then flood the tube with cavity wax from the other end, slosh it around, drain the excess and let it cure. It's a long process but essential. I let the wax flash off for a week or so, then cover all external holes with white electrical tape to keep contaminants out.

Also the exterior gets a few touch ups, the underside of the cable lugs gets very little paint from the factory, so a good idea to go over these areas with a few coats.

When I build a bike there are a lot of little touches to ensure longevity and reliability. A few of these needed to be carried out given the type of bike and the terrain to be covered. First off was adding a drain hole to the BB shell, tapping it M5 and adding a drain bolt.
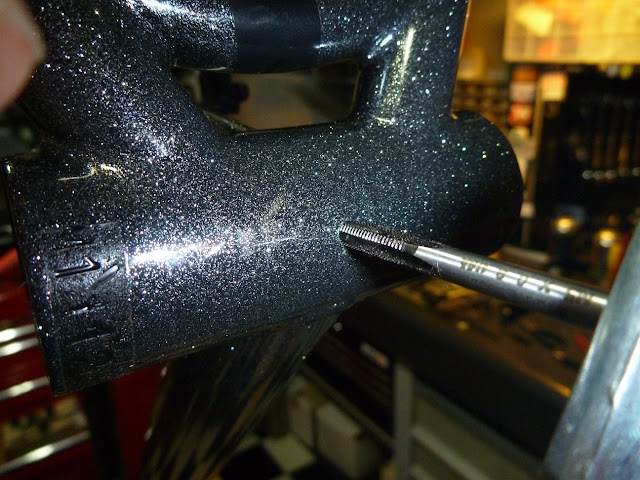
The BB shell faces weren't parallel or clean, so a face and chase was next.

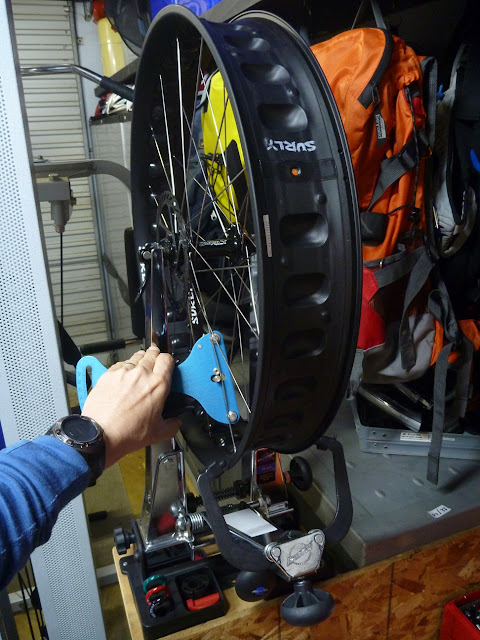
The spoke tensions weren't up to spec, a quick email to Bob at Surly confirmed 1200N/120kg for standard/drive and 1100N/110kg for offset side. Clown Shoe only just fitted in the Park truing stand with mm to spare.

Lots of lube. I like heavy oil on CPS hardware, assists with alignment and helps prevent corrosion freezing them in place.
Grease it, torque it, tune it. Replaced the phosphor black bolts on the cranks and stem with shiny stainless steel units.


Built up again, with a Revelate framebag (borrowed from the Fargo until my next order), Viscacha seatpack with Spocket, and Gastank bag. Applied some tough polyester tape under the framebag straps.
__________________________________________________________________________________
20-07-2012
Moonlander and LOCT seat
The next accesssory to fit on the Moonlander was a pet - more to the point, a pet monkey.
I've been running a LOCT seat on the Baby AC for some time now, replaced the Weeride seat as she had outgrown it. Still pick her up from school on the bike, not to mention the weekend trips.
More stuff fitted to the Moonlander. The LOCT seat for the pet monkey is a fantastic evolution from the Weeride. Very quick to mount and swap to different bikes if needed to, and leaves the rear of the bike to have a big rack for carrying more junk.
'Nuff talk, mo' pics.

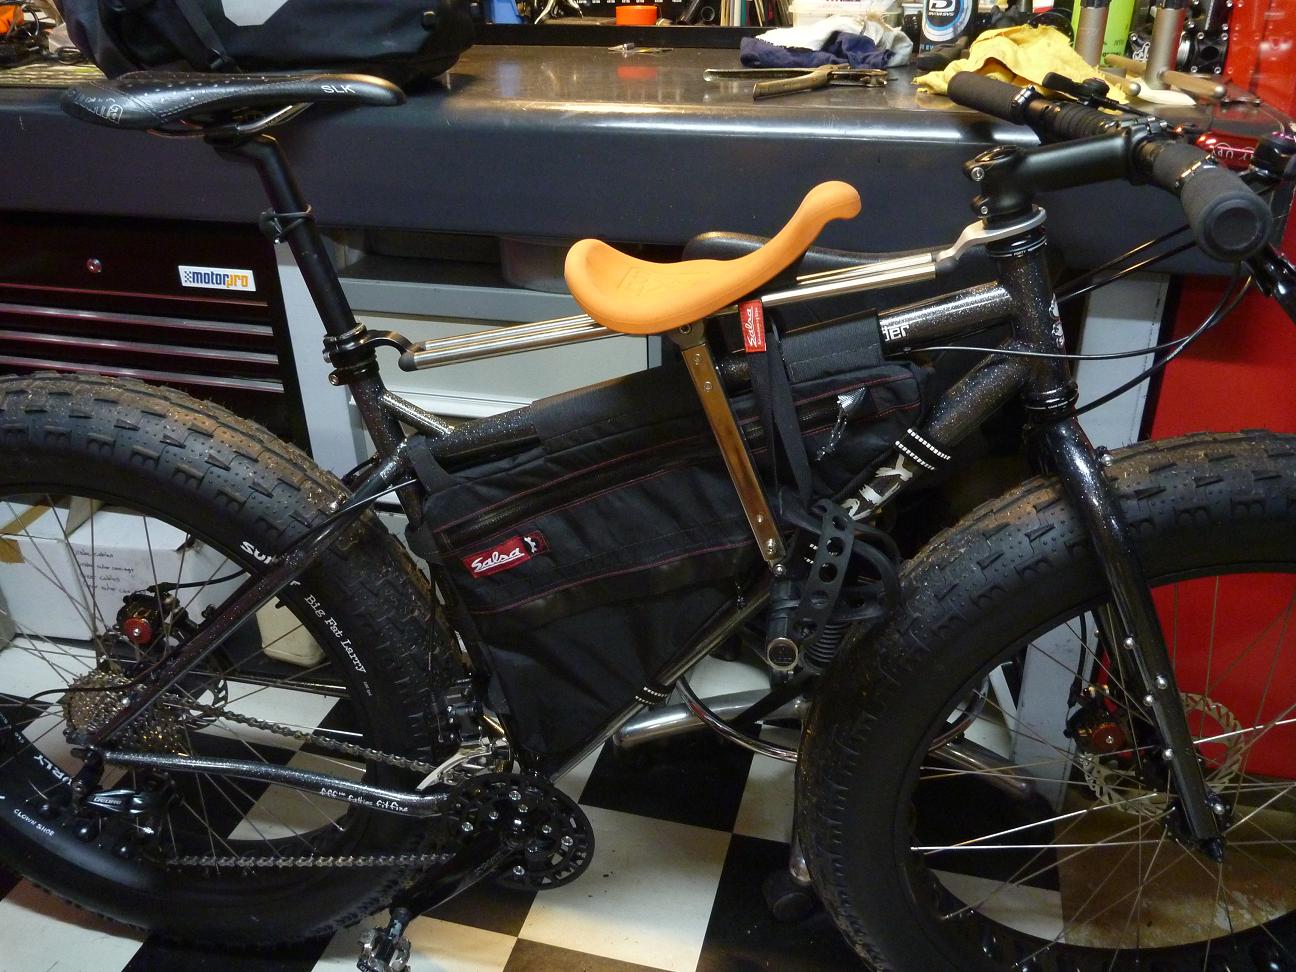
So, from the pic above, you can see basically how the LOCT sits. I have dropped the LOCT as low as possible, the monkey is getting tall now and her helmet does sit close to my chin. I can still access the framebag. She does climb up herself, because the BB is 100mm wide, she uses it as a foothold, then next foot onto her footrest then leg over the saddle.
Seatpost/frame mount. Fairly straightforward CNC machined bracket, with brass bushes in the bolted junction to the stainless steel rails. Stainless bolts, supplied with firm rubber isolators to prevent clamp damage to surfaces.

Fork steerer mount. Remove some stem spacers, then slip the mount in between the stem and the headset topcap, replace spacers as required. This mount is plastic and is a basic bearing - the silver alloy bracket is firmly mounted to the stainless steel rails and the plastic rotates within the alloy bracket. Lube occasionally.

You can move the LOCT saddle forward and backwards on the rails, but the footrests are fixed in position, so you have to watch the positioning in relation to the front wheel. The original rubber toestrap was starting to fail, so I've added some generic plastic toe clips to keep her shoes firmly locked in place. The strap running from rail to toe clip is to keep the throat of the toe clip open, and prevent the clip rotating forward.

The footrests are height adjustable - you can see the bolt and multiple mounting holes just above the pedal. I had to shorten them for the Moonlander, so she rides a bit more like a jockey on this bike, but can stretch out on the long travel dually.

I've still got plenty of room in front of my seat, you do have to ride with knees out a little bit, I ride with cleats and NEVER had an issue with sore knees - even on long and multiple day rides. You can see the bartape added, the monkey can even steer the bike with me riding no hands.

The LOCT seat is a very well thought out product and very well made. Materials and small parts are first rate, had it on the Moonlander for a recent weeklong trip on the beach and it looked the same as when we got it years ago.
If I was to make any suggestions/mods from an out of the box purchase, it would be to change the footrest/pedal to include some sort of toe clip. The rubber toe/foot strap wears through from the childs shoe, if that failed on a rough ride the potential is there that the childs foot could wedge between the fork and tyre.
We used a cheap silicone gel saddle cover, the pet monkey complained the orange seat alone made her tushy sore, no complaints with the gel cover.
I'm a huge fan of front mounted kiddy seats:
We love it!

__________________________________________________________________________________
10-08-2012
Moonlander and NU drivetrain
With so many drivetrain options out there, it can be hard to choose. When planning any bike build for myself or customers I look at many factors;
For the Moonlander and the predominant terrain I'll be covering in Australia, the Nu Vinci N360 was a clear standout for me. I had several options on the short list, but what I really liked about the N360 was the seamless linear change between ratios. You see, the Nu Vinci N360 is a CVP transmission, so unlike other internal geared hubs (IGH) there is no definitive step between gear ratios - twist the shifter and the ratio smoothly changes. On the Nu Vinci site there are videos, graphs, diagrams - even a support bulletin board/forum - that explain the N360, but you really gotta ride it to understand it.
I'll mostly be riding on sand, so a key thing about riding on sand is momentum - any loss of momentum risks stalling - riding on soft sand can be likened to riding up a slight constant gradient. The N360 is able to be shifted under load, so momentum loss is minimised during shifts. The hub is sealed for life, with only the freehub section accessible for routine maintenance.
So, let's start. I wanted to minimise this:

The kit. For reference this kit was packed on 09-09-2010. This does have an influence on the external performance of the kit, as Nu Vinci have made several changes and improvements to a few components. I bought the kit through Southcott Cycles, the distributor here in Australia. There is also an axle quick release kit available, yet to order one of these.

The spokes didn't come with the kit, I would normally roll my own odd sized spokes with my trusty Hozan spoke roller, but in this case I got them cut down to suit my requirements. They are double butted Alpine spokes, with a 14g body/thread and 13g at the J bend. The 20T Surly sprocket is extra too, matched well to the 36T chainring to be within the 1.8:1 gear ratio restriction for the hub.

You can see how well the 13g head matches the hole size of the hub, providing a much firmer interface between hub and spoke.

One thing about the Moonlander, is the 28mm offset of the rear to clear the drivetrain. The Clown Shoe rims are drilled to allow for the offset, but the spoke cross pattern, length and dish must respect the 28mm offset. Spacer tools are available to achieve the correct dish, which I'll show as required during the build process.

After backing off the spoke tension a few turns, the nips are spun out.

Then you should end up with a cool spiders web like this:

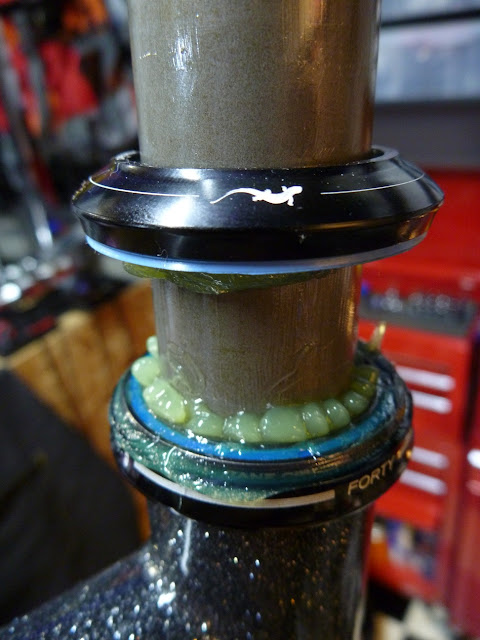
I wanted to prep the hub prior to installation, plus I wanted to see the innards of the freehub. I noticed there was a groove on the inside of the plastic cover on the right, but no o-ring in place. There was potential for contamination ingress at this point, so I sourced an o-ring from the spares dept, lubed the freehub pawls and needle roller bearings with some low viscosity freehub specific grease and reinstalled the cover and freehub body.


You can see here the slight gap between the plastic cover and the hub body - this is another point of entry for water, sand and general contamination.

Easy fix with a large o-ring to cover the gap. Should keep out a fair bit of debris, easy to remove/re-install when cleaning/servicing.

Two cross pattern is the recommended option, this gives a reasonable exit angle from the rim for the spoke. I have several special processes for my handbuilt wheels, the details of which are a close family secret, so we'll skip straight to the fully built wheel.
Due to the offset and dish of the wheel, I couldn't get the wheel in my Park Tool truing stand with the Moonlander dish tool, so I had to use the Pugsley 17.5mm offset tool in the stand, then swap to the 28mm tool for correct dish.

Spoke tension is quad checked during the build. No guesswork with tension.

Dishing the wheel.

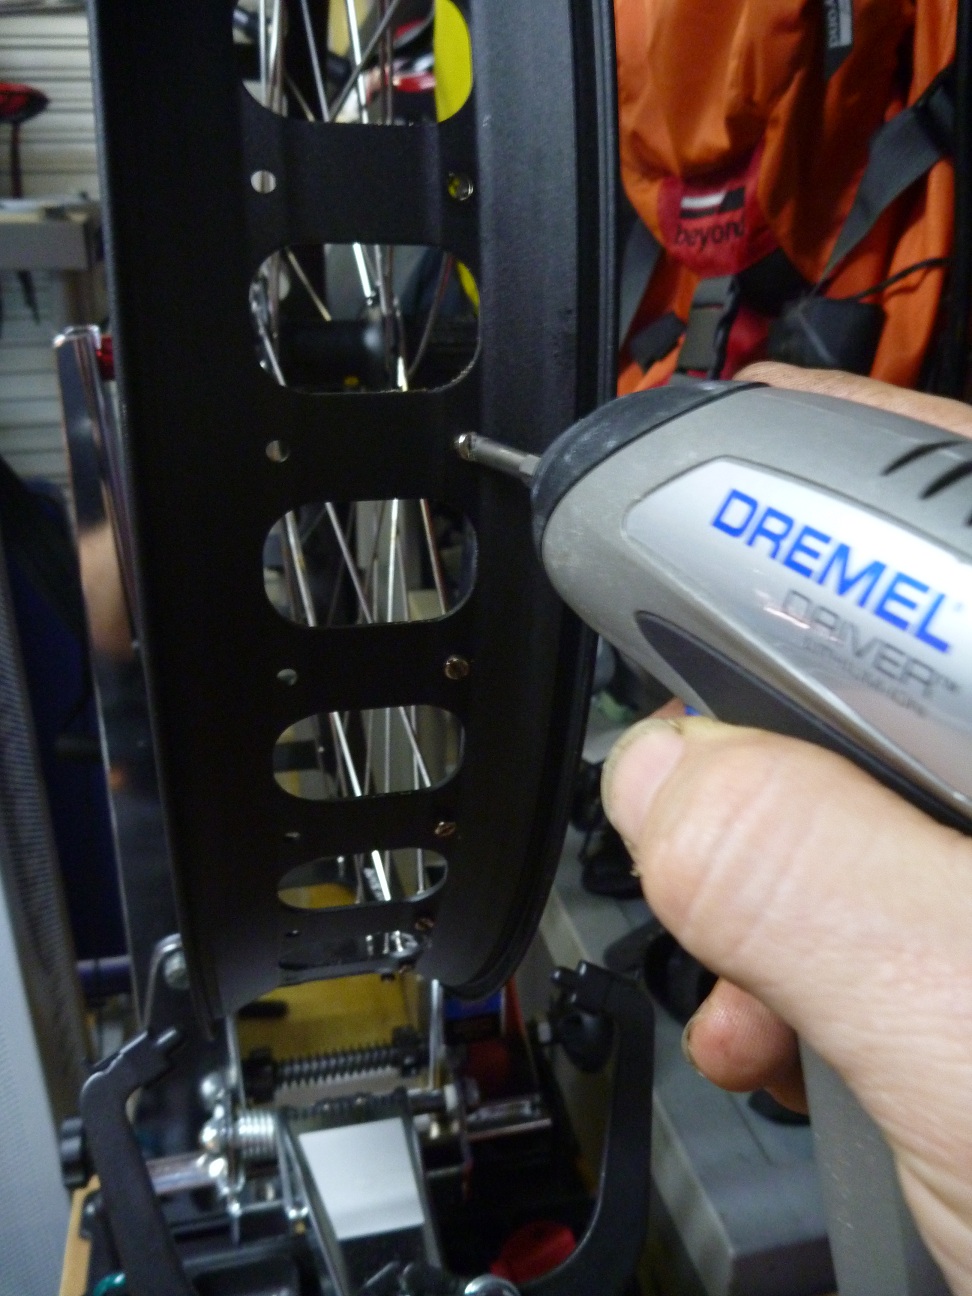
I'm very specific with my spoke lengths. I like the end of the spoke to finish right at the end of the nipple, this maximises the strength of the nipple, regardless of nipple material. I've gone with regular brass to minimise corrosion. Any high spokes get trimmed with the Dremel. A quick weigh-in of the complete wheel with tube and tyre came in at 6.1kg. Not a light package, but weight was not really a high priority for this build.


The instructions are very well laid out and descriptive. My old mate Calvin from Park Tool also has a detailed installation writeup for the N360 on his blog, 'Calvins Corner'

The gear change interface is easy to set up, plenty of grease during assembly to keep contamination and corrosion away.

The shifting is effected by a two cable system, cable diameter is 1.1mm so SRAM outer casing was used, as well as genuine cable specific lube. Super sliiiiiiick.


 The chain rubbed on the cable end as well as the shift interface, a quick flip of the sprocket rectified the chainline.


Much simpler cockpit, just the one twisty:

Much simpler drivetrain, no derailleurs or auxilliary chain devices:

End result is a much simpler bike externally, both visually and mechanically.

At the time of writing this, I have only ridden my N360 equipped Moonlander a handful of times on the street, in a week or so I will have solid data on how it performs, with a weekend riding on Moreton Island. We recently spent a week on the island with the original 2x9 drivetrain and saw how the sand affected the drivetrain, will be riding some of the same tracks fully loaded. Living the dream!

When I build a bike there are a lot of little touches to ensure longevity and reliability. A few of these needed to be carried out given the type of bike and the terrain to be covered. First off was adding a drain hole to the BB shell, tapping it M5 and adding a drain bolt.

The BB shell faces weren't parallel or clean, so a face and chase was next.

The spoke tensions weren't up to spec, a quick email to Bob at Surly confirmed 1200N/120kg for standard/drive and 1100N/110kg for offset side. Clown Shoe only just fitted in the Park truing stand with mm to spare.


Lots of lube. I like heavy oil on CPS hardware, assists with alignment and helps prevent corrosion freezing them in place.

Grease it, torque it, tune it. Replaced the phosphor black bolts on the cranks and stem with shiny stainless steel units.


Built up again, with a Revelate framebag (borrowed from the Fargo until my next order), Viscacha seatpack with Spocket, and Gastank bag. Applied some tough polyester tape under the framebag straps.

__________________________________________________________________________________
20-07-2012
Moonlander and LOCT seat
The next accesssory to fit on the Moonlander was a pet - more to the point, a pet monkey.
I've been running a LOCT seat on the Baby AC for some time now, replaced the Weeride seat as she had outgrown it. Still pick her up from school on the bike, not to mention the weekend trips.
More stuff fitted to the Moonlander. The LOCT seat for the pet monkey is a fantastic evolution from the Weeride. Very quick to mount and swap to different bikes if needed to, and leaves the rear of the bike to have a big rack for carrying more junk.
'Nuff talk, mo' pics.
So, from the pic above, you can see basically how the LOCT sits. I have dropped the LOCT as low as possible, the monkey is getting tall now and her helmet does sit close to my chin. I can still access the framebag. She does climb up herself, because the BB is 100mm wide, she uses it as a foothold, then next foot onto her footrest then leg over the saddle.
Seatpost/frame mount. Fairly straightforward CNC machined bracket, with brass bushes in the bolted junction to the stainless steel rails. Stainless bolts, supplied with firm rubber isolators to prevent clamp damage to surfaces.
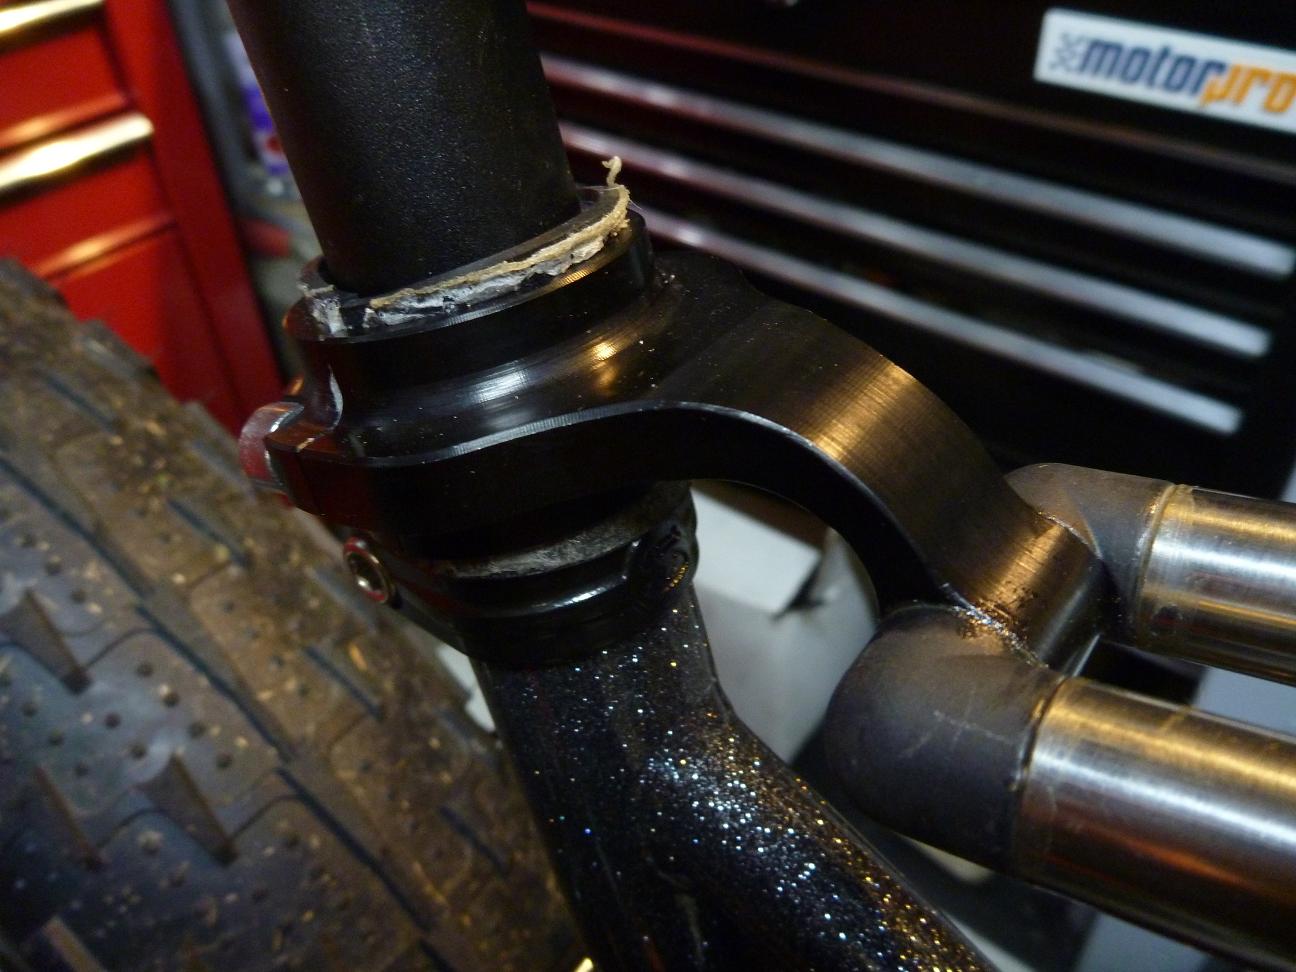
Fork steerer mount. Remove some stem spacers, then slip the mount in between the stem and the headset topcap, replace spacers as required. This mount is plastic and is a basic bearing - the silver alloy bracket is firmly mounted to the stainless steel rails and the plastic rotates within the alloy bracket. Lube occasionally.

You can move the LOCT saddle forward and backwards on the rails, but the footrests are fixed in position, so you have to watch the positioning in relation to the front wheel. The original rubber toestrap was starting to fail, so I've added some generic plastic toe clips to keep her shoes firmly locked in place. The strap running from rail to toe clip is to keep the throat of the toe clip open, and prevent the clip rotating forward.

The footrests are height adjustable - you can see the bolt and multiple mounting holes just above the pedal. I had to shorten them for the Moonlander, so she rides a bit more like a jockey on this bike, but can stretch out on the long travel dually.

I've still got plenty of room in front of my seat, you do have to ride with knees out a little bit, I ride with cleats and NEVER had an issue with sore knees - even on long and multiple day rides. You can see the bartape added, the monkey can even steer the bike with me riding no hands.

The LOCT seat is a very well thought out product and very well made. Materials and small parts are first rate, had it on the Moonlander for a recent weeklong trip on the beach and it looked the same as when we got it years ago.
If I was to make any suggestions/mods from an out of the box purchase, it would be to change the footrest/pedal to include some sort of toe clip. The rubber toe/foot strap wears through from the childs shoe, if that failed on a rough ride the potential is there that the childs foot could wedge between the fork and tyre.
We used a cheap silicone gel saddle cover, the pet monkey complained the orange seat alone made her tushy sore, no complaints with the gel cover.
I'm a huge fan of front mounted kiddy seats:
- the weight distribution is superior with less load on the rear wheel
- improved handling
- safer cockpit area for the little one
- better view and interaction on the trail
We love it!

__________________________________________________________________________________
10-08-2012
Moonlander and NU drivetrain
With so many drivetrain options out there, it can be hard to choose. When planning any bike build for myself or customers I look at many factors;
- budget
- existing frame or new, dropout type and compatibility
- load capacity, terrain and gear ratio requirements
- temperature and operational environment
- serviceability, duty cycle and maintenance complexity
- spares, warranty support and local backup
- weight
For the Moonlander and the predominant terrain I'll be covering in Australia, the Nu Vinci N360 was a clear standout for me. I had several options on the short list, but what I really liked about the N360 was the seamless linear change between ratios. You see, the Nu Vinci N360 is a CVP transmission, so unlike other internal geared hubs (IGH) there is no definitive step between gear ratios - twist the shifter and the ratio smoothly changes. On the Nu Vinci site there are videos, graphs, diagrams - even a support bulletin board/forum - that explain the N360, but you really gotta ride it to understand it.
I'll mostly be riding on sand, so a key thing about riding on sand is momentum - any loss of momentum risks stalling - riding on soft sand can be likened to riding up a slight constant gradient. The N360 is able to be shifted under load, so momentum loss is minimised during shifts. The hub is sealed for life, with only the freehub section accessible for routine maintenance.
So, let's start. I wanted to minimise this:

The kit. For reference this kit was packed on 09-09-2010. This does have an influence on the external performance of the kit, as Nu Vinci have made several changes and improvements to a few components. I bought the kit through Southcott Cycles, the distributor here in Australia. There is also an axle quick release kit available, yet to order one of these.

The spokes didn't come with the kit, I would normally roll my own odd sized spokes with my trusty Hozan spoke roller, but in this case I got them cut down to suit my requirements. They are double butted Alpine spokes, with a 14g body/thread and 13g at the J bend. The 20T Surly sprocket is extra too, matched well to the 36T chainring to be within the 1.8:1 gear ratio restriction for the hub.

You can see how well the 13g head matches the hole size of the hub, providing a much firmer interface between hub and spoke.

One thing about the Moonlander, is the 28mm offset of the rear to clear the drivetrain. The Clown Shoe rims are drilled to allow for the offset, but the spoke cross pattern, length and dish must respect the 28mm offset. Spacer tools are available to achieve the correct dish, which I'll show as required during the build process.

After backing off the spoke tension a few turns, the nips are spun out.
Then you should end up with a cool spiders web like this:

I wanted to prep the hub prior to installation, plus I wanted to see the innards of the freehub. I noticed there was a groove on the inside of the plastic cover on the right, but no o-ring in place. There was potential for contamination ingress at this point, so I sourced an o-ring from the spares dept, lubed the freehub pawls and needle roller bearings with some low viscosity freehub specific grease and reinstalled the cover and freehub body.


You can see here the slight gap between the plastic cover and the hub body - this is another point of entry for water, sand and general contamination.

Easy fix with a large o-ring to cover the gap. Should keep out a fair bit of debris, easy to remove/re-install when cleaning/servicing.

Two cross pattern is the recommended option, this gives a reasonable exit angle from the rim for the spoke. I have several special processes for my handbuilt wheels, the details of which are a close family secret, so we'll skip straight to the fully built wheel.
Due to the offset and dish of the wheel, I couldn't get the wheel in my Park Tool truing stand with the Moonlander dish tool, so I had to use the Pugsley 17.5mm offset tool in the stand, then swap to the 28mm tool for correct dish.

Spoke tension is quad checked during the build. No guesswork with tension.

Dishing the wheel.

I'm very specific with my spoke lengths. I like the end of the spoke to finish right at the end of the nipple, this maximises the strength of the nipple, regardless of nipple material. I've gone with regular brass to minimise corrosion. Any high spokes get trimmed with the Dremel. A quick weigh-in of the complete wheel with tube and tyre came in at 6.1kg. Not a light package, but weight was not really a high priority for this build.


The instructions are very well laid out and descriptive. My old mate Calvin from Park Tool also has a detailed installation writeup for the N360 on his blog, 'Calvins Corner'

The gear change interface is easy to set up, plenty of grease during assembly to keep contamination and corrosion away.

The shifting is effected by a two cable system, cable diameter is 1.1mm so SRAM outer casing was used, as well as genuine cable specific lube. Super sliiiiiiick.

Cable ends that clip into the shift interface on the hub:


Much simpler cockpit, just the one twisty:

Much simpler drivetrain, no derailleurs or auxilliary chain devices:

End result is a much simpler bike externally, both visually and mechanically.

At the time of writing this, I have only ridden my N360 equipped Moonlander a handful of times on the street, in a week or so I will have solid data on how it performs, with a weekend riding on Moreton Island. We recently spent a week on the island with the original 2x9 drivetrain and saw how the sand affected the drivetrain, will be riding some of the same tracks fully loaded. Living the dream!
Thanks! nice article...I'm building the same rear wheel set up except I'm going to try a belt drive. I wonder if you would share with me your rear spoke length?
ReplyDelete